Campsite Skills
How to Set Up a Tent: A Step-by-Step Guide
Learn how to set up a tent with this step-by-step guide for beginners. Covers site selection, poles, staking, rainfly, guy lines, and packing down.
Pitching a tent for the first time at a real campsite is the wrong moment to read the instructions. Practice at home, in your backyard or living room, at least once before your trip. You'll learn where the poles connect, which clips face which direction, and how long the whole process actually takes. That single practice run removes most of the frustration before it can happen outdoors.
This guide walks through every step in order, from reading the site to packing the tent back into its bag.
What You Need Before You Start
Most tents come with everything required: a tent body, a rainfly, poles, stakes, and sometimes a footprint (a ground sheet). Check that all pieces are present before you leave home.
Bring a few extras:
- Two or three additional stakes beyond what came in the bag
- A small mallet or smooth rock for driving stakes on hard ground
- A headlamp if there's any chance you'll be setting up after dark
- Guy line cord (often not included with budget tents)
If your tent is new, assemble it once at home just to confirm nothing is missing or damaged.
Step 1: Pick and Prepare Your Site
Before you touch the tent bag, spend five minutes choosing the right patch of ground. A bad site turns a comfortable night into a miserable one.
Look for a flat, clear area with natural wind protection. A slight downward slope away from the tent door is acceptable and keeps water from pooling underneath you.
Clear the Ground
Remove sticks, pinecones, and any rocks larger than your thumbnail. A single pebble under a sleeping pad can feel like a boulder by 2 a.m. If you find a root or a depression you can't fix, shift the tent a few feet.
Orient the Door
Think about wind direction before you stake anything. Face the door away from the prevailing wind. Rain and cold air come in fast if a gust catches an open door. If you're camping near a view, choose wind protection over the view.
Mark the Corners
Once you've chosen the spot, lay the footprint or tent floor out flat and check that the shape works with the available space. Adjust now rather than after the poles are up.
Step 2: Lay the Footprint
A footprint is a shaped ground cloth that sits under the tent floor. It protects the floor fabric from abrasion and reduces moisture wicking from the soil.
If your tent didn't come with a footprint, a generic tarp cut slightly smaller than the tent floor works. Smaller is important: a footprint that sticks out past the tent edges collects and channels rain under the floor, which defeats the purpose entirely.
Lay it flat and smooth. Orient it to match how the tent will sit, with corners roughly where the tent corners will land.
Step 3: Assemble the Poles
Most modern backpacking and car-camping tents use shock-corded poles, meaning the sections are connected by elastic cord and snap together automatically. Unfold each pole slowly rather than shaking it open; the snap can crack a ferrule (the metal tip) over time.
Identify Which Poles Go Where
Lay all poles out before threading anything. Most tents use color-coded poles or color-coded sleeves or clips. Match them according to your tent's instructions (keep that paper in the stuff sack permanently).
Thread or Clip
Tents attach poles to the body in one of two ways:
- Sleeves: You thread the pole tip through a fabric channel sewn into the tent. This takes longer but creates a stable, integrated structure.
- Clips: The tent body has plastic or fabric clips that snap onto the pole once it's in position. Faster and easier for beginners.
If your tent has sleeves, insert the pole tip at one end and feed it through the full length before bending it to attach at the other corner. Don't force it. If it's catching, the sleeve is likely twisted.
Step 4: Raise the Tent Body
Once the poles run through their sleeves or clips, bend each pole gently and seat the tips into the grommet holes at the tent corners. The tent will rise as the poles arc.
For a two-pole dome tent, crossing the poles through the middle gives the structure its shape. Both poles should seat snugly without you forcing them. If a pole tip won't reach a corner, check that you have the right pole in the right position.
Give the tent a gentle shake. It should feel stable but not rigid. Freestanding tents will stand without stakes at this point, but that doesn't mean you should skip staking.
Step 5: Stake It Out
Staking is not optional, even on a calm day. A freestanding tent that isn't staked can roll and tumble in a modest gust, taking your gear with it. Stake into the wind so the tent pulls against the force rather than lifting with it.
Stake Angles Matter
Drive each stake at roughly a 45-degree angle, angling away from the tent. A vertical stake pulls straight out under load; an angled stake holds the ground much better.
Hard Ground
On hard or rocky ground, look for natural anchors: loop guy line around a tree root or a large rock. Carry a few extra-long stakes for these situations.
| Corner | Stake angle | Direction |
|---|---|---|
| Windward corners | 45° away from tent | Into the wind |
| Leeward corners | 45° away from tent | Away from tent |
| Guy line stakes | 45° away from tent | Extend the line taut |
Stake all four corners before you attach the rainfly. A staked tent floor keeps the body from shifting while you work.
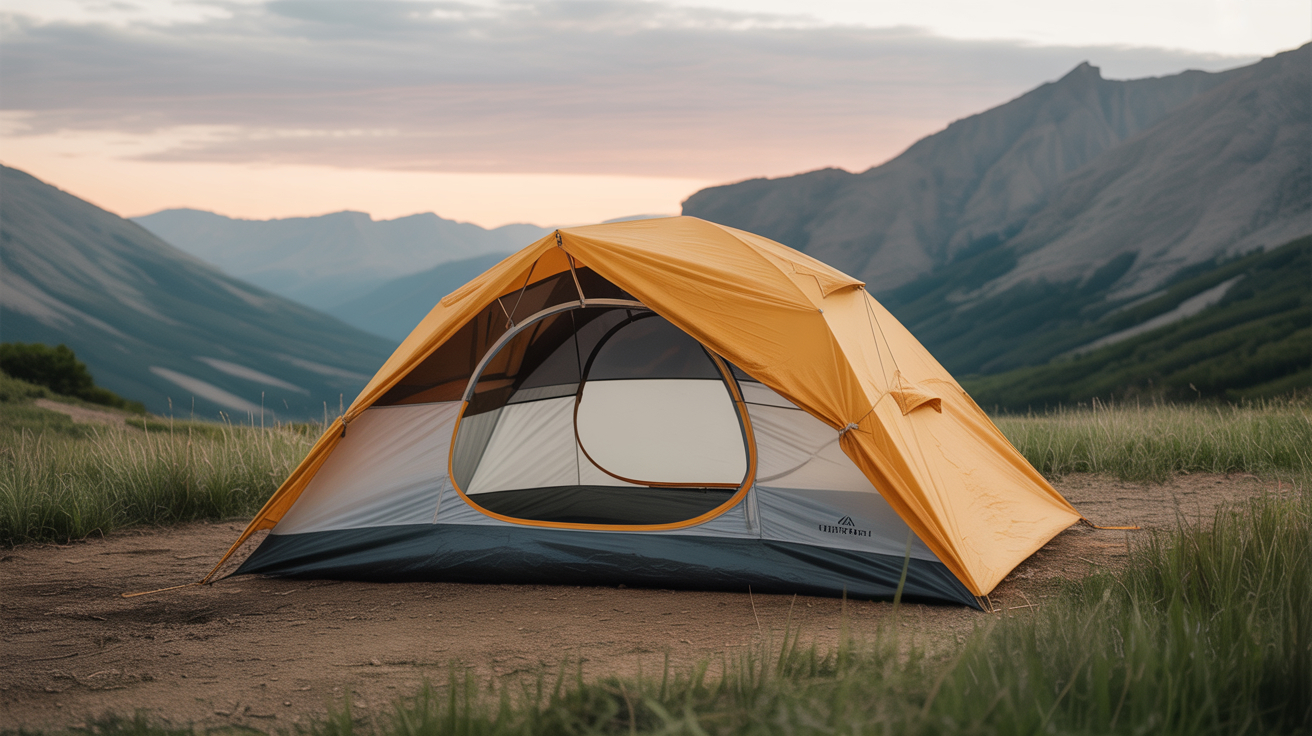
Step 6: Attach the Rainfly
The rainfly is the waterproof shell that drapes over the tent body. It does not touch the inner tent fabric directly; the gap between them is essential. That air gap lets moisture vapor escape from inside rather than condensing on the inner walls and dripping on you.
Pull It Taut
Clip or loop the rainfly attachment points to the poles or stake points as directed. Then tension the fly until there are no sags or loose panels. A saggy rainfly collects water in pockets and can let rain drip through seams under the accumulated weight. Tight is correct.
If the fly has its own stake loops along the sides, stake those out now. They hold the fly away from the inner tent and maintain the ventilation gap.
Condensation Tip
Even a well-tensioned rainfly will show some condensation on the interior surface on cool mornings. That's normal. Keep the tent's mesh vents open whenever rain allows; airflow is the main way to manage it. Closing all vents to "stay warmer" usually makes things damper, not drier.
Step 7: Stake Out the Guy Lines
Guy lines are thin cords that attach to loops on the rainfly or tent body and run out to separate stakes. They're what keep a tent from deforming or collapsing in serious wind.
Budget tents often don't include guy lines. Pick up a small spool of reflective paracord and cut four to six lengths of about 6 feet each. Tie a line to each corner loop and any midpoint loops along the fly ridge.
Stake each guy line out at a 45-degree angle, then adjust the tensioners (small plastic slides on each cord) until the line is firm but not so tight it distorts the fly. A taut guy line turns the tent into a stable, low-drag shape in wind. A loose one does almost nothing.
Reflective cord is worth the small cost: you'll trip over your own guy lines in the dark exactly once before appreciating it.
Quick-Reference Setup Checklist
Follow these steps in order every time:
- Choose and clear a flat site; orient the door away from wind
- Lay the footprint, sized smaller than the tent floor
- Unfold and connect all poles; match colors if applicable
- Thread poles through sleeves or attach clips along the body
- Seat pole tips into corner grommets and raise the tent
- Stake all four corners at 45° angles, into the wind
- Drape the rainfly and clip it to poles or stake points
- Tension the fly until no panels sag; stake fly corners
- Run guy lines from fly loops to separate stakes; tension until firm
- Open mesh vents for airflow
Taking Down and Packing the Tent
Packing a wet tent into its original bag without damaging it is a skill worth developing.
Dry It When You Can
If conditions allow, shake the tent out and let the fly dry in the sun before packing. A tent packed wet and left in a bag for days develops mildew. Even a few minutes of drying time helps.
Remove Stakes First
Pull every stake before you do anything else. Leave a stake in the ground while removing poles and you'll tear a stake loop or crack a grommet.
Fold, Don't Stuff (or Stuff, Not Roll)
Most modern tent bags are sized for stuffing, not rolling. Stuffing randomly distributes stress across the fabric and avoids folding along the same crease every time. The alternative is a loose fold in a different orientation each trip. Rolling tightly and creasing in the same place repeatedly weakens the waterproof coating.
Poles should be kept in their separate sleeve or bag; they'll puncture the tent body if packed loosely together.
Compress the Fly Last
Fold or stuff the fly separately from the tent body if storage space allows. The fly takes most of the wear from rain and UV, so keeping it separate for inspection makes damage easier to spot.
Frequently Asked Questions
How long does it take to set up a tent?
Most two-person dome tents take 10 to 20 minutes for a first-timer and 5 to 10 minutes after a few practice runs. Practice at home once or twice and the time drops fast. Setting up in the dark without prior practice can take 45 minutes or longer.
Do I need to stake a tent on a calm night?
Yes. Wind conditions change quickly, especially overnight, and an unstaked tent can become a sail. Stakes also keep the tent floor taut, which improves comfort and prevents the walls from collapsing inward. The time cost is under two minutes.
Can I set up a tent on gravel or sand?
Yes, with the right stakes. Standard hook stakes pull out of loose soil easily. For sand, use wide sand-anchor stakes or fill a stuff sack with sand and bury it as a deadman anchor. For gravel, longer skewer-style stakes or stakes with a hook at the end hold better than short tapered ones.
What do I do if a pole breaks?
Most tent kits include a repair sleeve, a short metal tube that slides over a cracked pole section and holds it straight. Keep one in your kit. If you don't have a sleeve, split a stick to the same diameter, wrap it tightly against the crack with duct tape, and the pole will hold for the rest of the trip.
Should I put the rainfly on if it's not raining?
Usually yes, especially overnight. Even on clear nights, morning dew soaks an unprotected tent body. The rainfly also adds a layer of insulation and keeps condensation on its outer surface rather than on the mesh inner tent. The main reason to skip it is airflow on a hot night when rain is truly not possible.
A solid campsite starts before the first stake goes in. Picking the right spot and reading wind direction take two minutes and make every step easier. Once the tent is up and you're ready to settle in, knowing how to build and manage a campfire safely is the next practical skill to have in hand. And if temperatures drop overnight, a good setup combined with the right layering and insulation choices keeps an uncomfortable night from turning into a dangerous one.